How to Remove Bubbles in Headlight Tint Covers


Headlight tinting is a popular modification that can enhance the appearance of your vehicle and provide a sleek, customized look. However, one common challenge that enthusiasts face when applying headlight tint is the formation of bubbles.
These bubbles not only detract from the overall aesthetics but can also hinder the functionality of the lights. In this blog post, we will guide you through a step-by-step process on how to remove bubbles from headlight tint and achieve a smooth, flawless finish.
Materials Needed:
- Heat gun or hairdryer
- Microfiber cloth or soft towel
- Spray bottle filled with a mixture of mild soap and water
- Plastic squeegee or credit card
- Small pin or needle (optional)
Step-by-Step Guide:
1. Assess the Bubbles
Before starting the removal process, take a close look at the bubbles on your headlight tint. Some bubbles may be large and easily noticeable, while others may be smaller and more spread out. Understanding the extent and size of the bubbles will help you determine the best approach to remove them effectively.
2. Apply Heat:
Using a heat gun or a hairdryer set on low heat, apply heat to the area with the bubbles. Hold the heat source a few inches away from the tint and move it in a sweeping motion. The heat will soften the adhesive underneath, making it easier to manipulate and remove the bubbles.
3. Press and Smooth:
As the adhesive softens, use a microfiber cloth or soft towel to gently press and smooth out the bubbles. Start from the center of each bubble and work your way towards the edges. Apply firm, but not excessive, pressure to avoid damaging the tint.
4. Use a Squeegee or Credit Card:
For larger bubbles that are more stubborn, a plastic squeegee or credit card can be helpful. Place the edge of the squeegee or card on one side of the bubble and slowly push it towards the other side, while maintaining pressure. This motion should force the trapped air out from under the tint, eliminating the bubble.
5. Mist with Soap and Water:
If you encounter particularly resistant bubbles, mist the area with a mixture of mild soap and water from a spray bottle. This will act as a lubricant, allowing you to slide the tint more easily and remove the bubbles. Use the squeegee or credit card again to smooth out the tint.
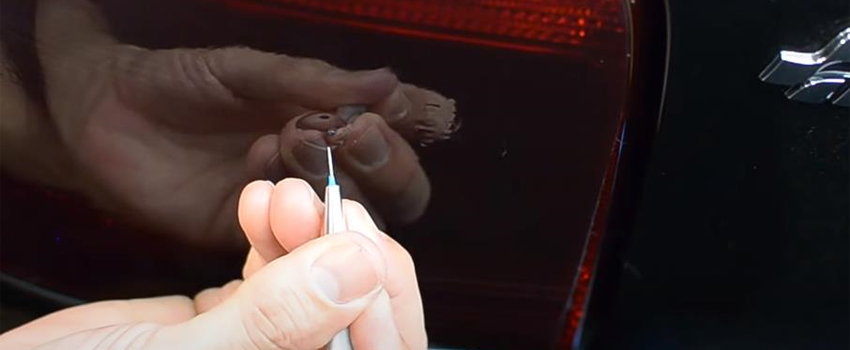
6. Pop Stubborn Bubbles (Optional):
If you still have stubborn bubbles that refuse to dissipate, you can use a small pin or needle to gently prick the bubble. Make sure to be extremely cautious and use minimal force to avoid damaging the tint or scratching the headlight. Once the bubble is punctured, smooth it out with the squeegee or credit card.
7. Repeat if Necessary:
If you encounter multiple bubbles, repeat the process on each bubble individually. Take your time and be patient, as rushing may lead to damage or imperfections.
Enjoy your bubble-free Lamin-x!
Removing bubbles from headlight tint requires a careful and methodical approach. By applying heat, pressing and smoothing, using a squeegee or credit card, and misting with soap and water, you can effectively eliminate bubbles and achieve a seamless, professional-looking finish.
Remember to take your time, be patient, and exercise caution to avoid damaging the tint or the headlight itself. With a little effort and attention to detail, you can enjoy the aesthetic benefits of headlight tinting without the annoyance of unsightly bubbles.
Recent Posts
-
Feb 6th 2024
New Partnership in Europe
Feb 6th 2024 -
Jan 9th 2024
Improve Your Car's Resale Value with Paint Protection Film
Paint protection film, also known as PPF or clear bra, is a thin, transparent layer of f …Jan 9th 2024 -
Nov 3rd 2023
Introducing Ricochet - Your Ultimate Paint Protection Solution!
We are thrilled to announce the arrival of a game-changing product that will revolutioni …Nov 3rd 2023